Comment mesurer
Style Specific Quick Links:
Les produits VC sont fabriqués sur mesure en très petites quantités, ce qui peut entraîner de légères variations dans les dimensions des produits. Bien que nous incluions une note de variance sur tous nos tableaux de tailles, nous souhaitions expliquer pourquoi cela se produit et comment vous pouvez mesurer pour vérifier d'éventuelles différences.
Nos produits sont fabriqués à la main sur commande. Veuillez tenir compte des écarts de taille pouvant aller jusqu'à 1/2" par mesure.
Raisons des variations de mesure
1. Découpe de panneaux
Tous les produits VC sont découpés à partir de patrons méticuleusement développés et cousus selon des instructions techniques détaillées. Cependant, il y a une certaine marge d'erreur humaine, en particulier lors du processus de découpe du tissu.
Si un coupeur s'écarte de la ligne de patron, le vêtement peut se retrouver légèrement plus grand. À l'inverse, si le coupeur va à l'intérieur de la ligne, le vêtement peut être légèrement plus petit. En comparant deux maillots de la même style et taille, l'un coupé à l'extérieur de la ligne et l'autre à l'intérieur, vous pourriez remarquer une variation d'environ 1/2". Bien que cette différence soit relativement petite et tombe généralement dans notre tolérance acceptable, elle peut néanmoins être perceptible.
2. Méthodes de couture
Tout comme aucun artiste ne peint de la même manière, aucune couturière ne coud exactement de la même façon. Semblable à l'exemple précédent, si deux personnes différentes cousent deux de vos vêtements, de légères variations dans leurs méthodes peuvent entraîner des différences mesurables.
Avez-vous déjà commandé votre t-shirt préféré de votre marque préférée et remarqué qu'il taille différemment ? Vérifiez où le t-shirt a été fabriqué : s'il provient de deux pays différents, la différence vient probablement d'interprétations variées des mêmes détails de taille et de construction.
3. Rétrécissement
Dernier point mais non des moindres, il y a le rétrécissement des tissus. L'impression sérigraphique et la sublimation impliquent d'exposer les vêtements et les tissus à des températures élevées, ce qui peut entraîner un rétrécissement notable du vêtement fini ou des panneaux de sublimation.
Le rétrécissement du tissu fait référence à la réduction de la taille d'un tissu ou d'un vêtement après qu'il a été lavé, séché ou exposé à certaines conditions comme la chaleur ou l'humidité. Ce phénomène se produit en raison de la relaxation des fibres qui étaient auparavant étirées ou tendues pendant le processus de fabrication du tissu.
Lorsqu'ils sont exposées à l'eau, à la chaleur ou à l'agitation, les fibres du tissu retrouvent leur état naturel, ce qui entraîne une diminution des dimensions globales du tissu.
Vous remarquerez que sur notre page d'informations sur la sérigraphie, et sur toutes les descriptions de produits imprimables, nous vous demandons de prévoir un potentiel de rétrécissement de 3 à 7 %, ce qui peut équivaloir à une réduction de 3/4 à 2" de la longueur totale du corps (les produits rétrécissent généralement en longueur).
Comment mesurer
Maintenant que nous comprenons pourquoi les produits rétrécissent, discutons de la manière de lire correctement nos tableaux de tailles, de mesurer le vêtement que vous examinez et de comparer les deux pour déterminer s'il se situe dans la "tolérance acceptable".
1. Trouver les tableaux des tailles de produit
Pour commencer, vous aurez besoin du tableau des tailles spécifique au produit VC que vous examinez. Rendez-vous sur la page produit pour trouver un tableau des tailles détaillé pour chaque article. Pour une vue d'ensemble, notre page des tailles regroupe tous nos tableaux en un seul endroit.
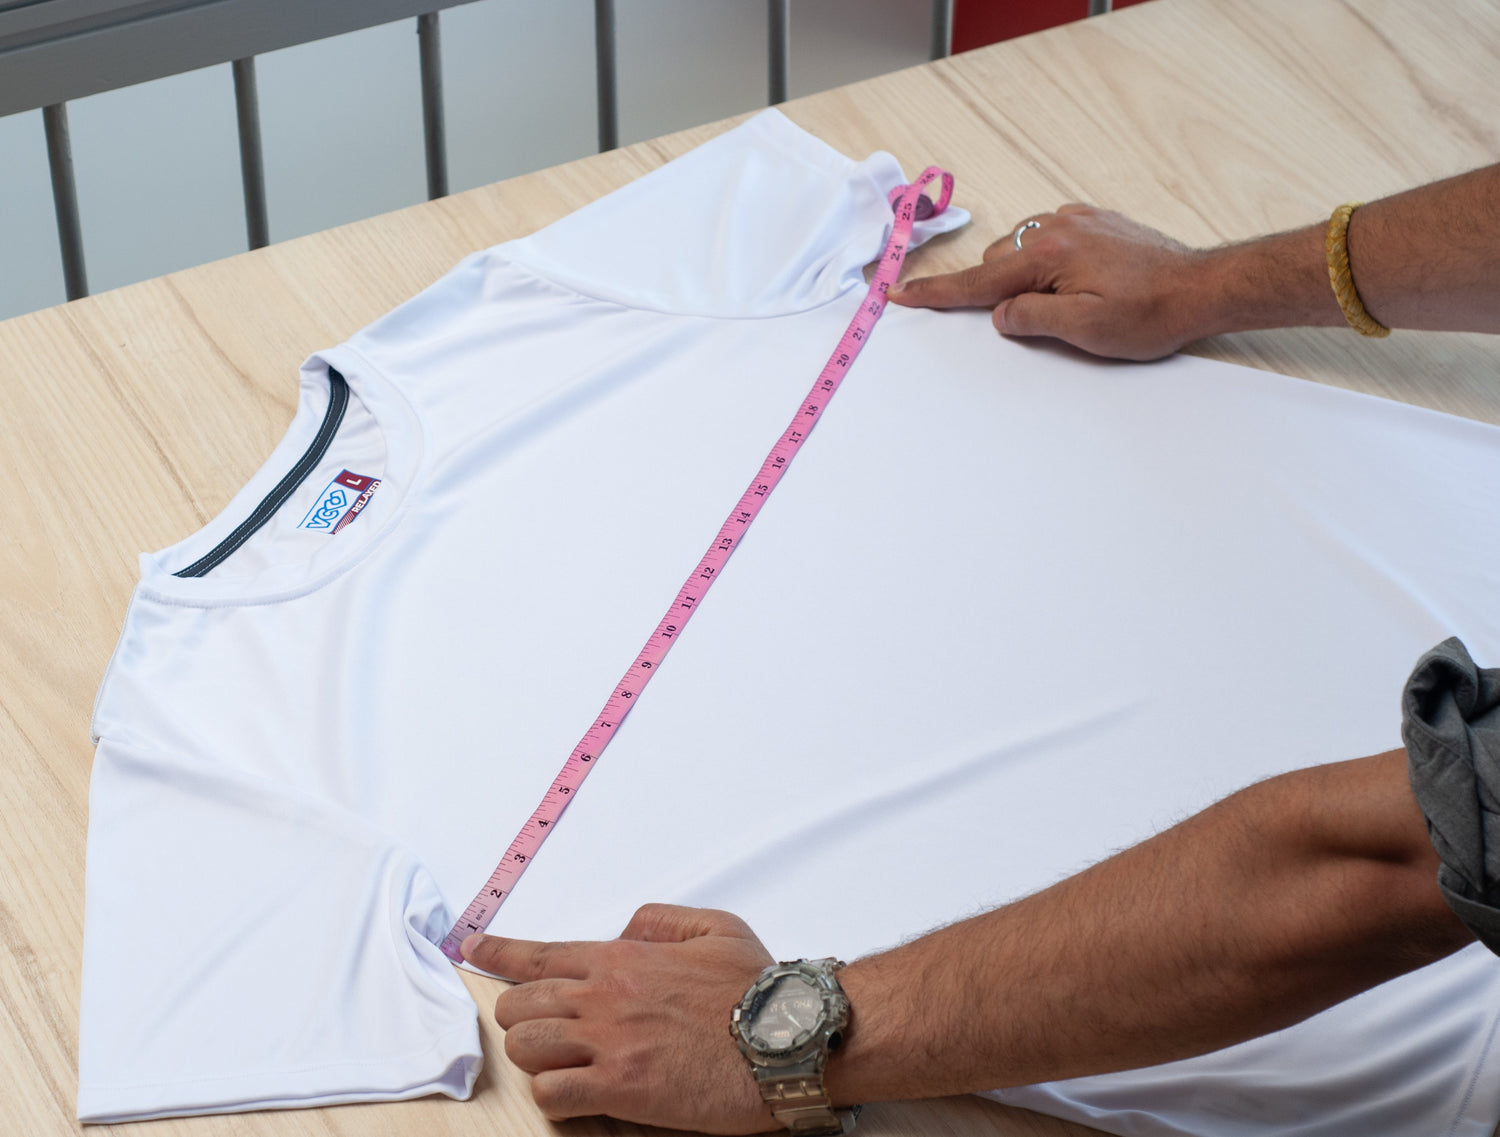
Chaque tableau a une image illustrant comment prendre des mesures précises, accompagnée d'un tableau de dimensions en pouces.

2. Mesurez Votre Vêtement


3. Comparer au tableau
Comment choisir votre taille
Choisir la bonne taille à partir d'un tableau peut être délicat. N'oubliez pas que nos tableaux de tailles reflètent les dimensions des vêtements, pas les mesures du corps.
Pour trouver votre taille parfaite, mesurez votre chemise préférée et comparez ces dimensions à notre tableau des tailles. De cette façon, vous pourrez choisir une taille qui correspond à la coupe de votre favori de confiance.
Conseil: Utiliser un maillot VC récent comme point de référence est certainement un bon début, mais nous recommandons toujours de confirmer en utilisant les tableaux de tailles. Non seulement certains de nos ajustements ont évolué au cours des dernières années, mais nous avons ajouté des ajustements pour essayer d'être plus inclusifs des différentes morphologies.
Points de mesure spécifiques au style
Chacune de nos grilles de tailles est unique à ce produit spécifique. Veuillez trouver ci-dessous le produit que vous souhaitez mesurer pour voir les points de mesure spécifiques.
Camisole
Largeur de poitrine au niveau de l'emmanchure (y compris le biais).

Longueur du corps du centre du cou arrière (y compris le biais) jusqu'à l'ourlet avant.

Sweat à capuche Revolution
Largeur de la poitrine au niveau de l'emmanchure.

Longueur du corps du point le plus élevé de l'épaule (sans inclure la capuche) jusqu'à l'ourlet inférieur.

Longueur de la manche depuis le cou (sans inclure la capuche) jusqu'à l'ourlet inférieur.

Short FlexLight
Mesure complète de la taille tout autour - assurez-vous de suivre la courbe de l'élastique. Notez que la mesure est une mesure détendue (sans l'élastique étiré). Elle s'étirera confortablement jusqu'à 6" de plus lorsqu'elle est portée.

Longueur de l'extérieur de la couture, du bord supérieur du short (y compris la ceinture) jusqu'à l'ourlet inférieur. Notez que ces shorts n'ont pas de couture sur le bord extérieur - étalez les shorts à plat comme indiqué pour prendre la mesure correctement.

Longueur d'entrejambe de l'entrejambe à l'ourlet inférieur, suivant la couture intérieure de la jambe.

Shorty Short
Mesure complète de la taille tout autour - assurez-vous de suivre la courbe de l'élastique. Notez que la mesure est une mesure détendue (sans l'élastique étiré). Elle s'étirera confortablement jusqu'à 6" de plus lorsqu'elle est portée.

Mesure de la taille à la partie la plus large des hanches (7-8" en dessous de la ceinture) - assurez-vous de suivre la courbe des panneaux du short. Notez que ce sera une mesure à moitié lorsqu'elle est prise à plat, donc vous devez doubler cette mesure pour obtenir la largeur totale autour des hanches du short.

Longueur de l'extérieur de la couture de la taille jusqu'au bas du panneau latéral.

Longueur d'entrejambe de l'entrejambe à l'ourlet inférieur, suivant la couture intérieure de la jambe.


